Pointing nodes
Principle of pointing nodes
The pointing nodes are entities that can take various forms and that will allow to point to 2D and 3D objects. Depending on the protocol used, the pointing node will be different.
By default, in a standard protocol, the mouse is the default pointing node. In specific cases, it can be replaced by a 3D pointing node that will allow keyboard or joystick interaction.
In VR protocols, the pointing node is a VR controller (or possibly both). In a Cave protocol, the pointing node is a VRPN-dependent node.
The pointing node has an action button that will enable behaviors on the pointed object.
It is important to differentiate between the pointing node and the input node. Pointing does not necessarily mean seizing objects in the environment. MindDev offers a specific input system as an option to the pointing node.
It is necessary to differentiate the pointing node from the interaction/movement tool. It is possible to move with a tool and to point with another (case of VR controllers, mouse)
Nodes can have different origins (mouse => invisible, input => 3D object, VR controller => entity, vrpn => script), they have in common some parameters and properties
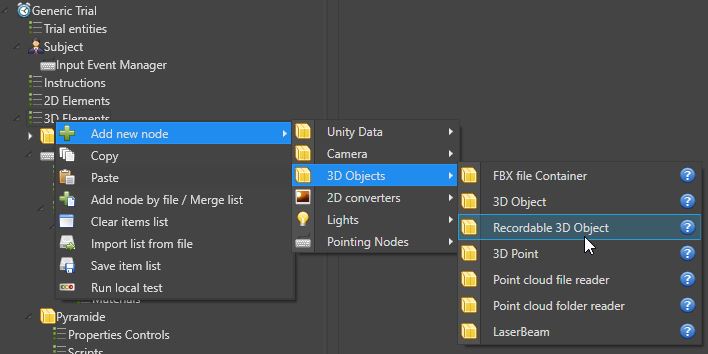
Type of pointing nodes
Mouse pointing is the default pointing and does not require any additional settings. A "keyboard" pointing (i.e. an object, which can have a behavior, that will point in a direction and wait for the input of a specific keyboard key), will be a 3D object, while in VR protocol, pointing nodes are VR Hand Component entities. Finally, in Cave protocol, the declaration of a pointing node is done using a script.
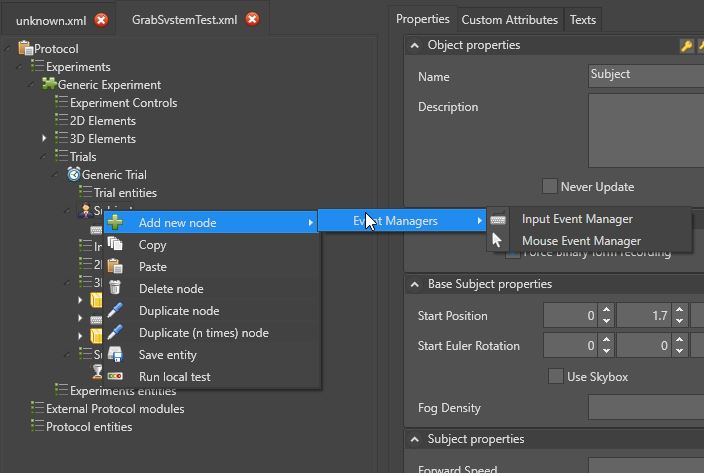
event handler
Generally, depending on the protocol, the event handler is configured and does not require special attention. In a standard protocol, the event handler will handle the mouse, while in VR, the VR event handler will handle the declared controller(s). In Cave protocol, a VRPN event handler allows the management of information coming from the VRPN protocol. It is possible to change the event handler by right-clicking and changing the handler.
Pointing node setting
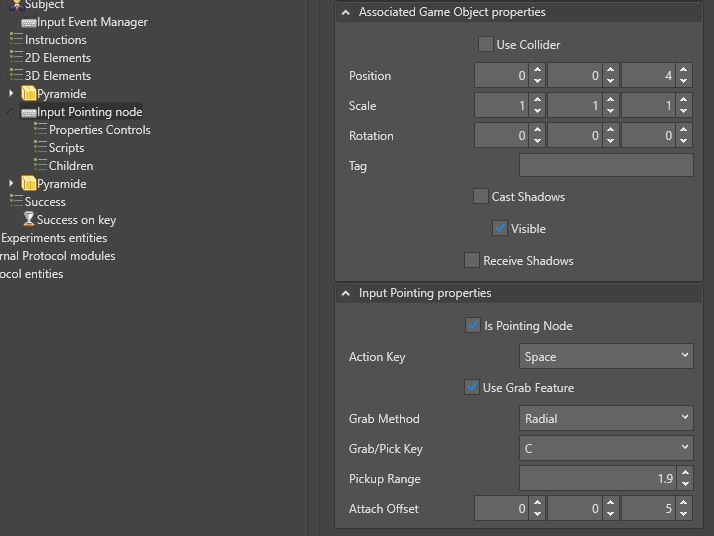
The parameters are common to all pointing nodes (except the mouse, which has no parameters). A pointing node must first be declared (via a checkbox). It may be necessary to assign an action key (automatic on VR and VRPN devices).
Laser display (direct option or child node)
Depending on the added pointing node (except for the mouse which does not have this option) the pointing node can have a red laser added to it allowing the user to have feedback on the pointing in 3D.
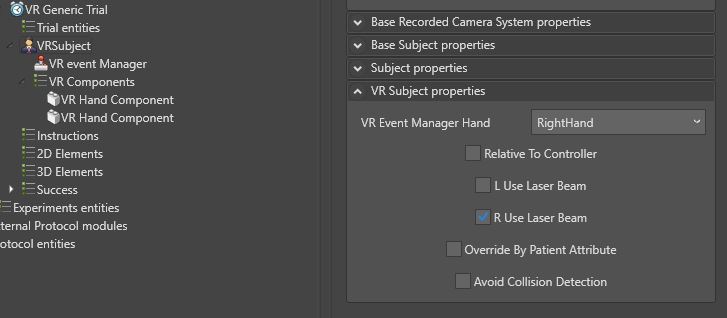
Laser in VR
In the case of the VR protocol, the laser is an option of the subject.
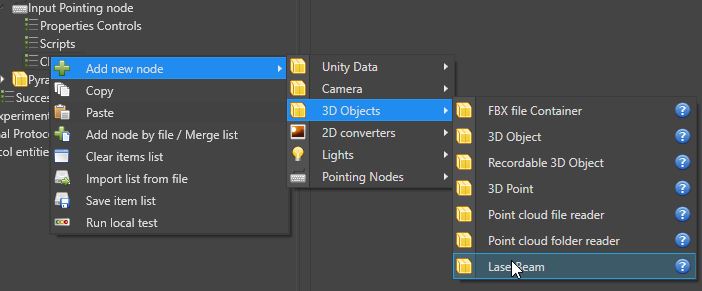
To add a laser to the pointing node, when the option is not available directly, it is possible to add a 3D object "Laser Beam" as a child of the pointing node.
Entering objects
A pointing node can be declared as an object input node. The pointing entities have an option to enable object input in 3D space.
The option "Use input functionality" allows to use a second key (or button depending on the device) for object input.
The input button is not the only setting in the input system.
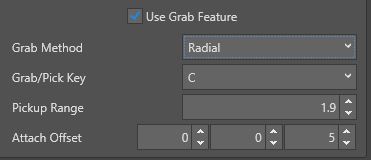
The parameters are as follows:
- Pointing method (Radial or Pointer)
- The input distance (expressed in meters)
- The position of the attachment (expressed in the pointing node datum).
Pointing method
The two pointing methods differ. In radial, the system will capture the first object in a distance less than the capture distance, even if the subject does not point in the direction of the object. This method is very useful when accuracy is not required, and more reactivity is needed during the test.
The "Pointer" method allows the input of the object pointed by the pointing node. The input requires a high degree of precision but allows the input of small objects among a large number. This method is to be avoided in case of input of moving objects or if reactivation is necessary.
Attachment position
Attachment position allows to place an offset between the pivot points of the pointing node and the entered object. If the offset is set to 0, it is possible for the pointing node represented by a 3D object to visually collide with the input object.
Constraints on object input
The input of objects is done under constraints. First of all, not all objects can be entered. Also, only one object can be entered at any given time for a pointing node.
MindDev makes extensive use of Unity's physics engine for input management, so an input object must be a physical object (i.e. have a "Rigid Body" behavior) and have a collision. These two constraints are enough to allow an object to be seized, however, it is quite possible to have some objects with these behaviors while wanting to prohibit their seizure.
To overcome this problem, the object must, in addition, be declared, seizable in MindDev.
There are therefore 3 constraints to make an object seizable:
- Declare it physically
- That it has a collision
- Declare it "Seizable".
These 3 declarations are done directly in MindDev. The collision declaration is done directly in the object properties, while the "physical" and "grabbable" declarations are done using the custom attributes.
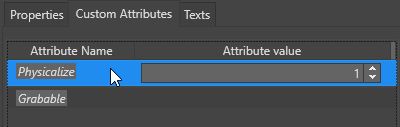
Physicalize parameter
The "Physicalize" attribute has a floating value corresponding to the mass of the object expressed in kg. The heavier the object the more impact it will have on the environment when thrown.
Scratchable in C# ?
In the case of computer development in the form of C# code, the declaration of a "Grabable" object is automatic the 3D object has a behavior whose code inherits the interface "IGrabEventListener".
Physics of grabbed objects
Since MindDev uses the Unity physics engine, it is possible to give physical behaviors to objects, in the form of materials. The declaration of the physical behavior is done in the form of a custom attribute allowing to select a physical material from a list.
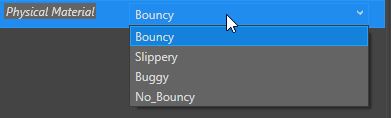
Becoming physical properties.
The list of physical behaviors is bound to change in the future.
Recording the trajectories of captured objects
It is quite possible to record the trajectories of captured objects. To do so, the graspable object must be a registered 3D object. This object is different from the conventional 3D object which is not registered.