Working with Assets Bundles
Unity version
MindDev 2025 uses version 2022 of Unity (2022.3.53), while earlier versions of MindDev use version 2020 (2020.2.1).
URP + VR
When using an Asset Bundle with the URP renderer in VR, special provisions must be integrated. A section at the bottom of the page indicates how to produce them.
Creation of Assets bundles
Assets Bundles compilation script
The creation of Unity Assets Bundles is simple and requires only a few actions. However, a script must be produced to generate the files that will be used later. This script is always the same and can be found in the official Unity documentation:
using UnityEditor;
using System.IO;

public class CreateAssetBundles
{
    [MenuItem("Assets/Build AssetBundles")]
    static void BuildAllAssetBundles()
    {
        string assetBundleDirectory = "Assets/AssetBundles";
        if (!Directory.Exists(assetBundleDirectory))
        {
            Directory.CreateDirectory(assetBundleDirectory);
        }
        BuildPipeline.BuildAssetBundles(assetBundleDirectory, BuildAssetBundleOptions.None, BuildTarget.StandaloneWindows);
    }
}
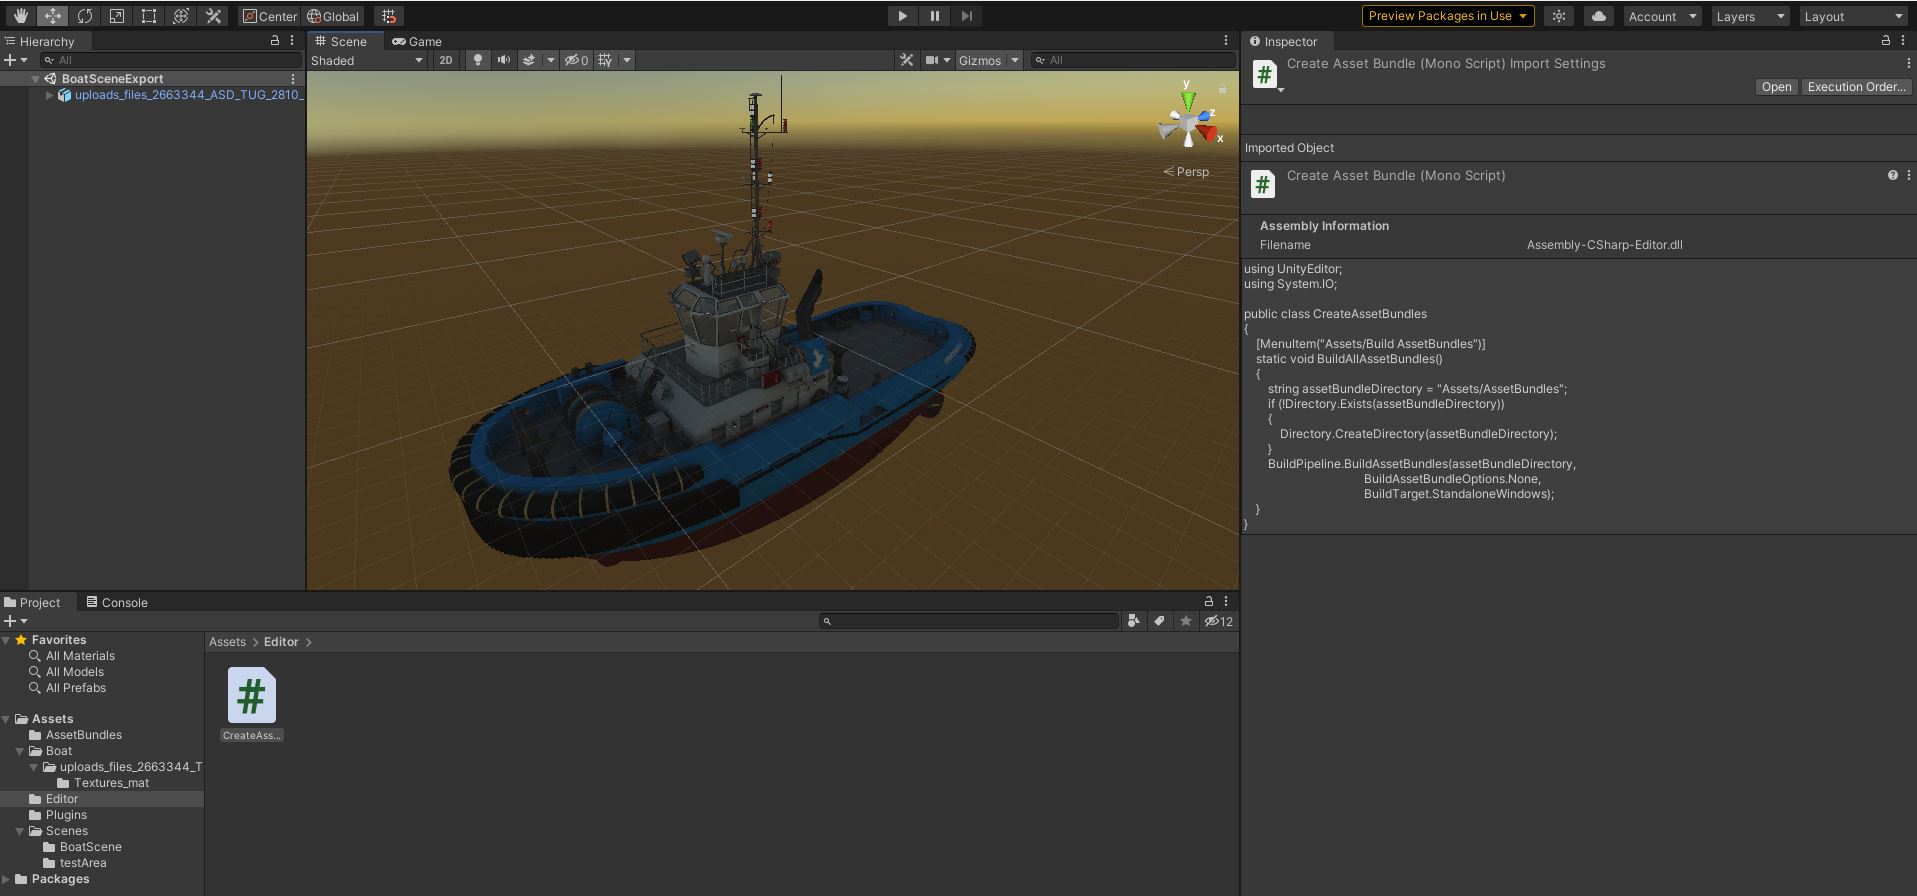
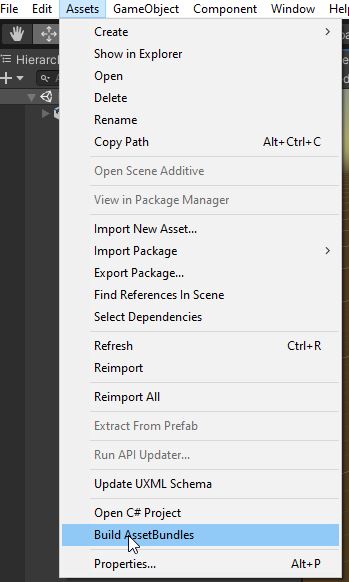
The .Cs script should be placed in the Editor folder of the Assets folder of the Unity project. After this editor script is integrated, the menu bar is expanded.
Asset Bundle referencing and generation
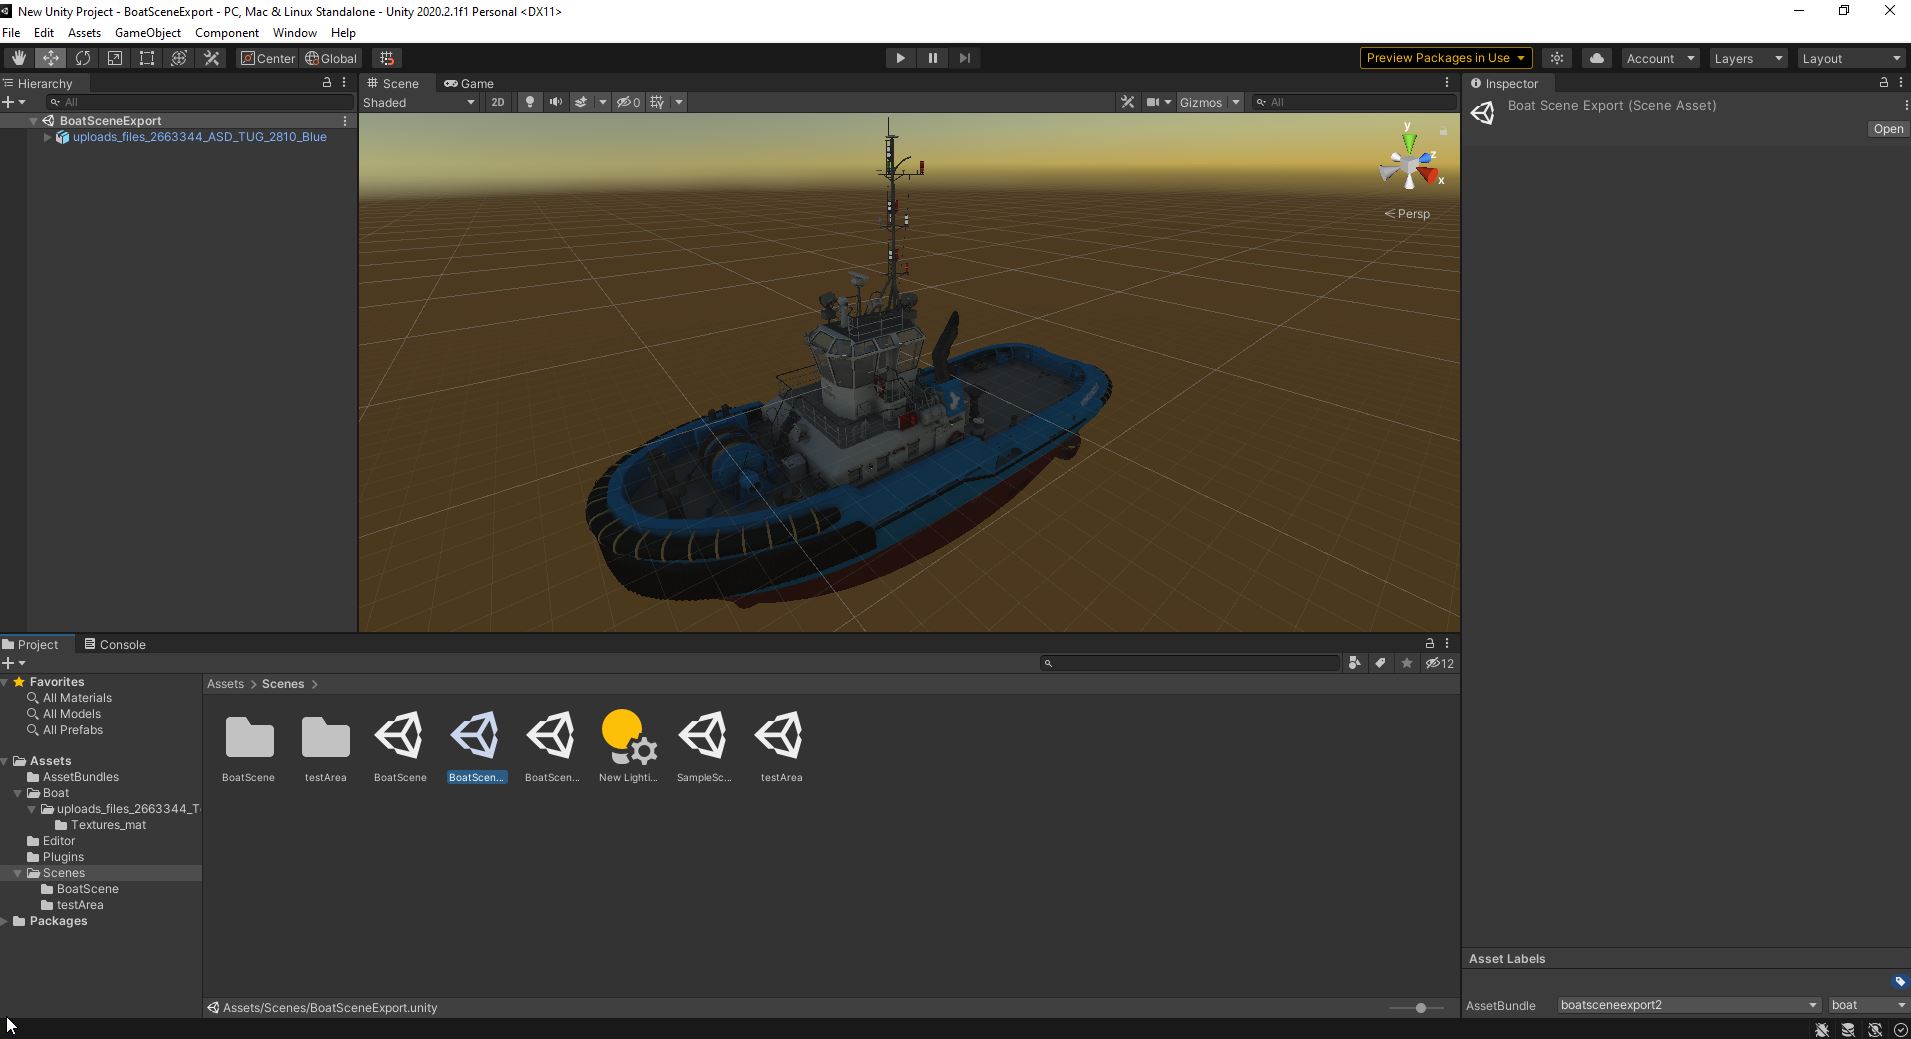
The built-in script is not enough to create the Asset Bundles. Indeed, we now need to declare the objects and scenes that will be embedded in the Assets Bundles files. To do this, we need to go into the Unity project area and select the items one by one so as to assign them a container name:

When generating via the Asset Bundles creation script, a special folder named AssetBundles is created in the project directory. This folder contains all the created Assets Bundles files.
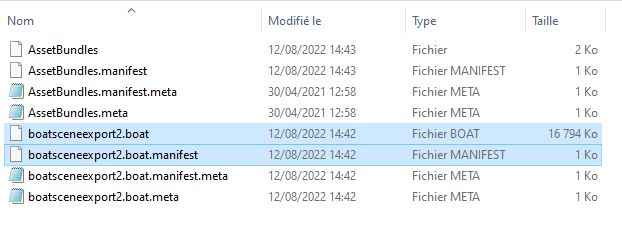
In our case, only the boatsceneexport2.boat file is important, the other files are useless however, it is important to note that it is possible that one Asset Bundle references another Asset Bundle file, so for simplicity, it is appropriate to copy the entire contents of the generated folder into the MindDev user data folder.
Copy to MindDev
It is necessary to copy the data to the MindDev user data folder, because the software will only load data if it is present in this folder.
Using asset bundles
When the asset bundle is copied to the MindDev data folder, it becomes usable. MindDev provides two types of asset bundle loaders. The first one allows the loading of prefabs and offers the possibility to assign them a position and an orientation as well as a specific behavior. The second one consists in loading a complete scene on which there will be no direct control. This second option is interesting, because it allows you to exploit light textures for example.
Scene Export
When exporting a Unity scene, it can be interesting to remove the sunlight. MindDev indeed offers a lighting system allowing the illumination of a complete scene with a simple configuration possibility. Whatever the lighting system chosen, it is advisable either to remove the dynamic lighting of its scene, or to remove the dynamic lighting of MindDev.
!!! Warning "Camera in a Unity scene
When exporting the Asset Bundle, it is advisable to delete all the cameras in the scene. Indeed, the rendering being managed by MindDev, you should not have any camera in the scene at the risk of seeing it activated instead of the MindDev cameras.
!!! Warning "loading time
Asset Bundles may take a long time to load depending on the heaviness of the embedded objects.
Manifest file
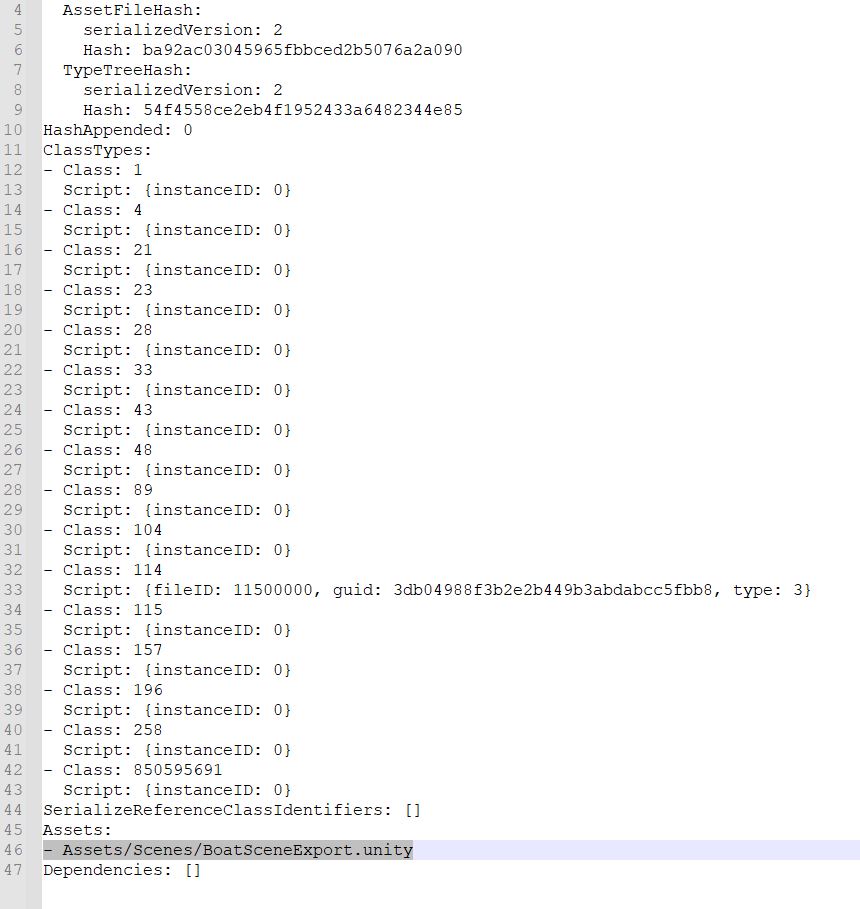
For each asset bundle file created, a manifest file with the same name is added. This manifest file contains human readable information to know the names of the objects and scenes contained in the Asset Bundle. These names are used in MindDev to load the data.
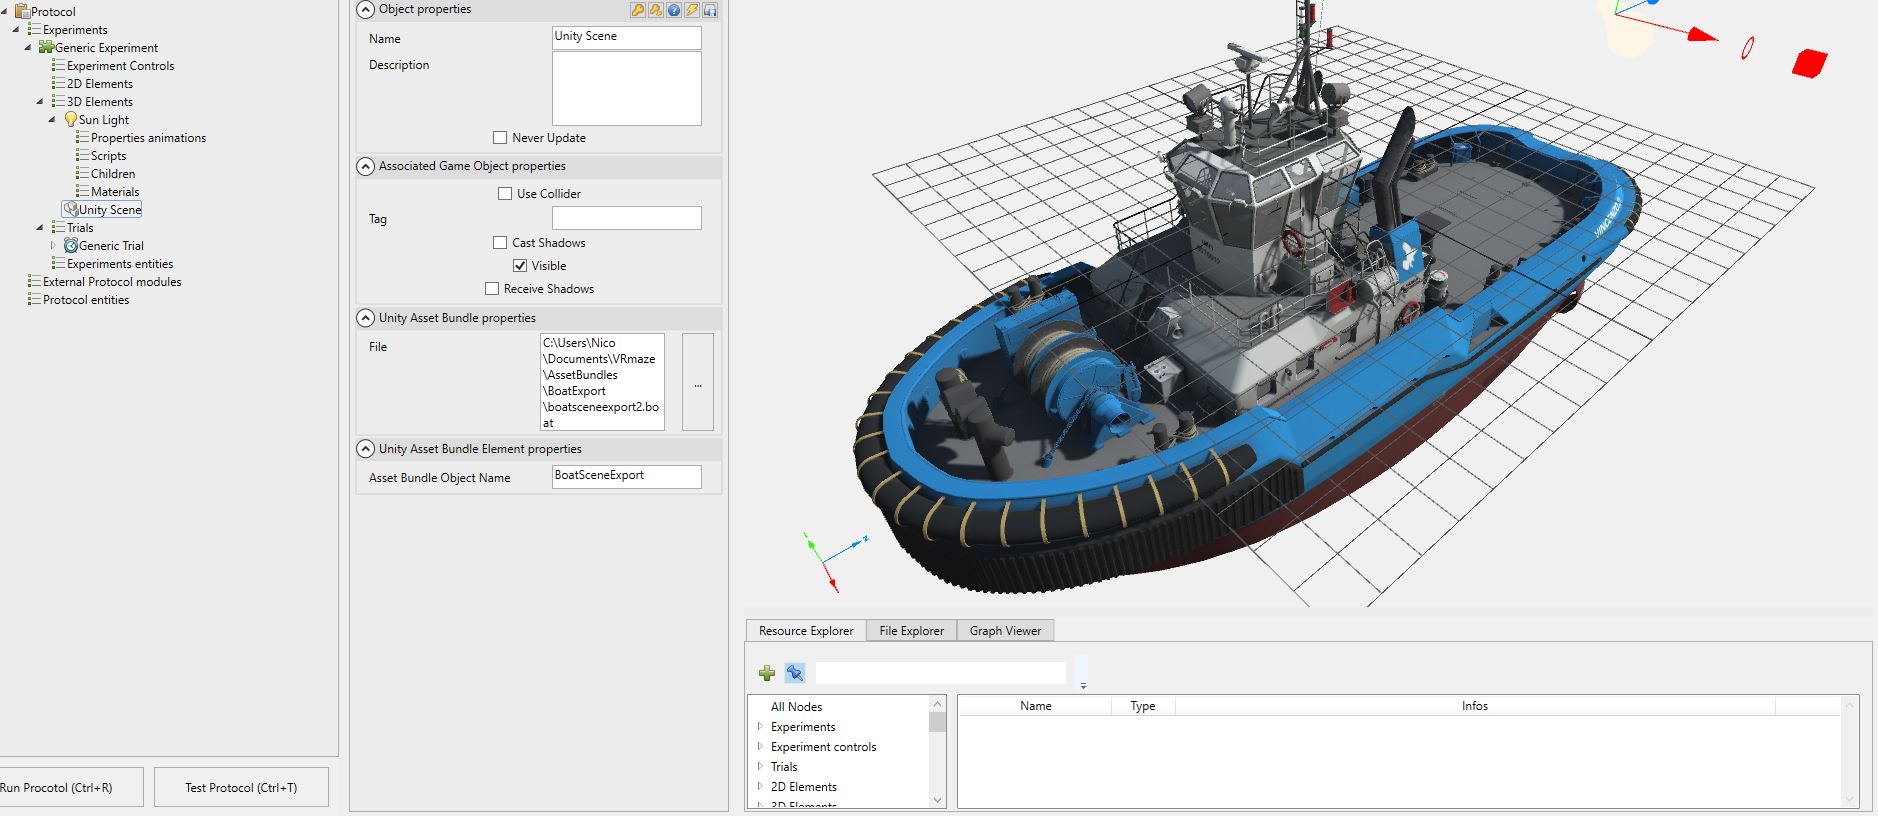
Asset name in MindDev
MindDev expects the name of the resource to be loaded into the Asset Bundle file. Only the name is needed, not the path. So, for the resource written as Assets/Scenes/BoatSceneExport.unity, you will just need to specify BoatSceneExport in the Unity Scene object of MindDev.
URP + Assets Bundle + VR!
URP renderer
This consideration is to be taken into account only when using the URP renderer (default from MindDev 2023).
Asset bundle in VR with URP!
There is a special consideration when using an Asset Bundle for VR with the URP renderer.
Asset Bundles are a bit special in that they bundle compiled shaders into the bundle. So when you download an asset bundle, the materials in the bundle will use the shaders specified in the bundle rather than those included from MindDev.
This is normally the ideal behavior, but building an asset bundle in an external project that has different project settings can lead to major display issues.
Since this is the case with MindDev, (you are building Asset Bundles without the MindDev project), you can run into problems when the shaders in the bundle do not support all of the features required by MindDev.
For example, if you create asset bundles in a project that does not have an XR module installed, the build process will remove all instances of XR shaders in your bundle. This will result in shaders that do not support the instantiated rendering used by MindDev and will only be visible on one eye!
To allow proper visualization of a VR-loaded asset bundle, make sure that the project building the asset bundle follows these recommendations:
- Extract all materials
- Activate the XR module
- Enable the OpenVR loader
- Force embed all shaders
Materials extraction
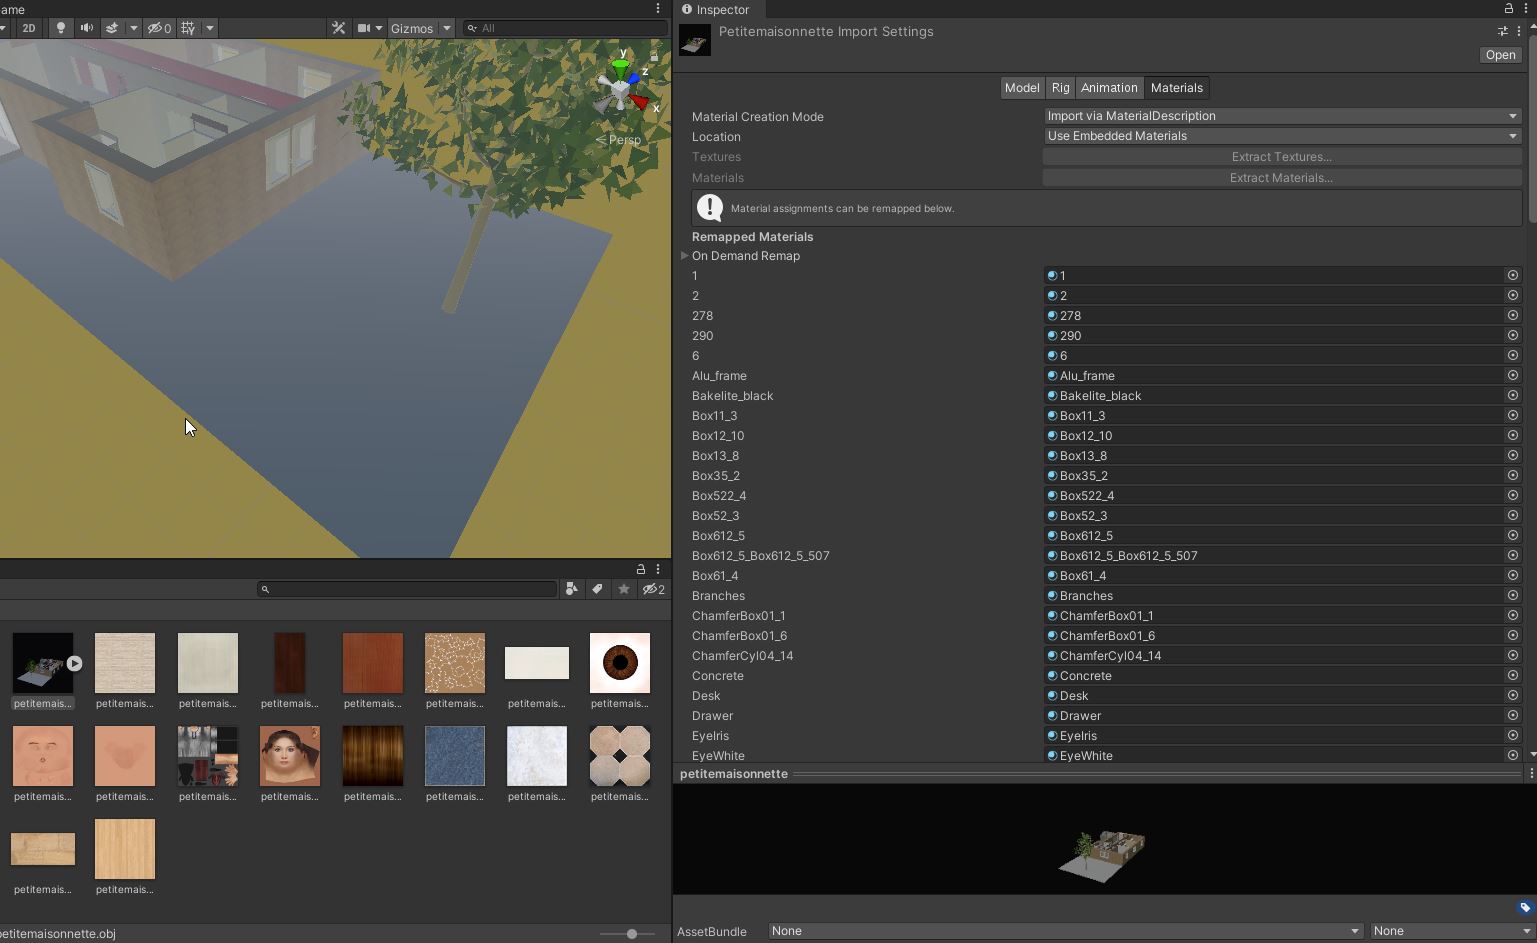
It is likely that the Asset Bundle is from an external model (in Blender, 3DS Max or any other). When the file (Obj, FBX etc.) is imported into the Unity project, it is necessary to extract the materials and textures; this allows to modify or adjust the parameters of each object independently.
To do this, select the modeling file directly in the project tab of Unity, and click on the material extraction button.
read more: Unity page
Enable XR module
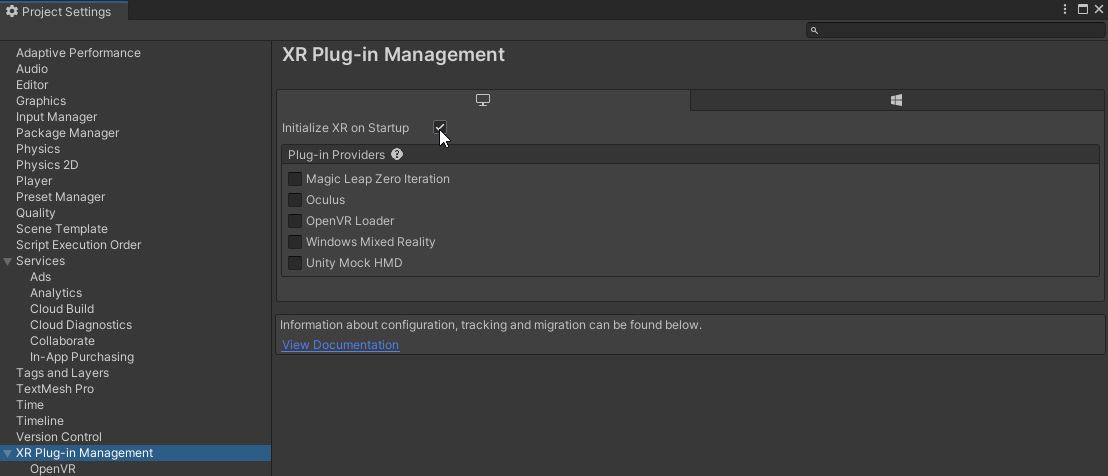
To enable proper display in VR, it should be indicated that the shaders should incorporate VR functionality. To do this, the first thing to do is to activate the XR module in the Unity project.
It is necessary to go to the project properties (Edit/ProjectSettings) and go to the very bottom of the list of project options so as to enable the XR module.
Install the OpenVR loader
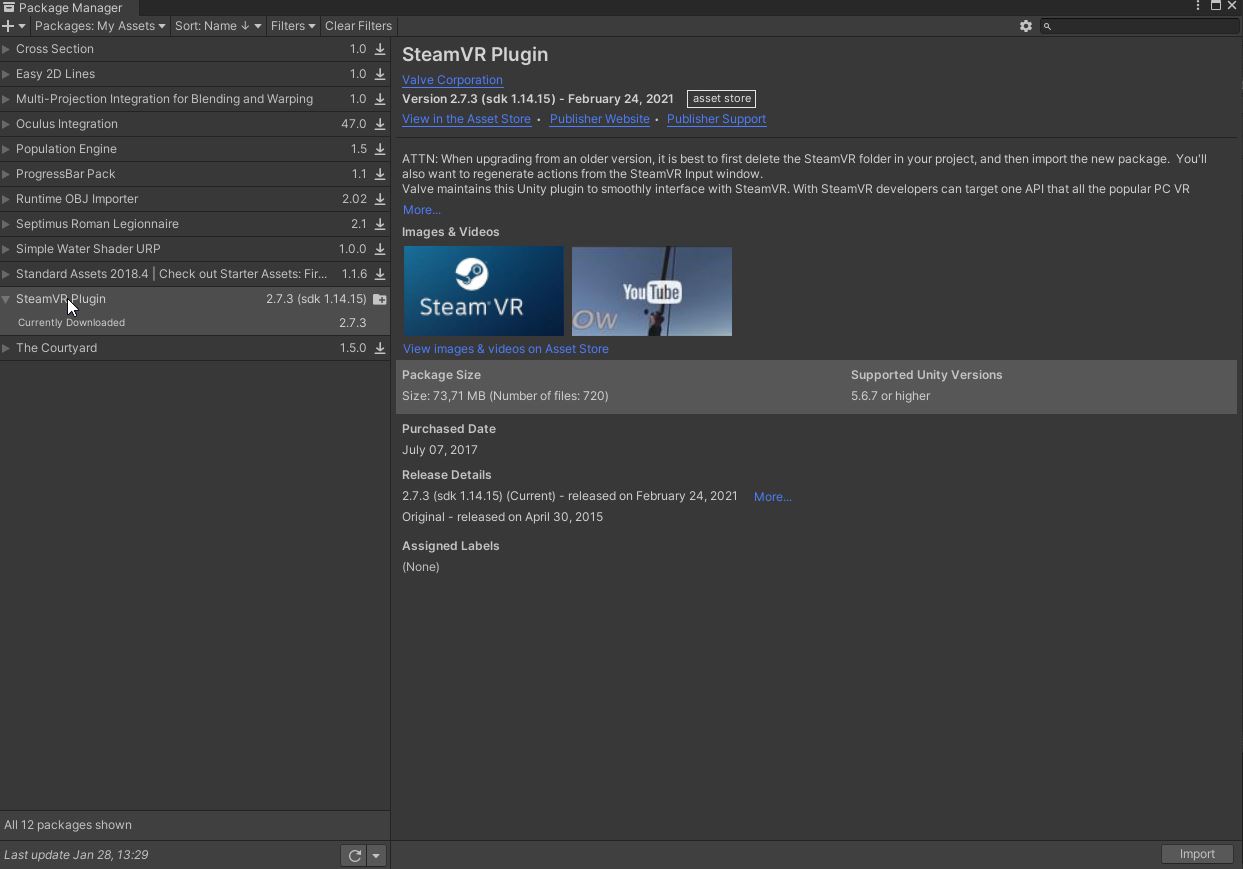
By default, the OpenVR loader is not available in Unity. MindDev relies on this loader to enable VR display. To enable it, you must first install the SteamVR plugin. Its installation is possible by downloading the package (free) from the Unity store here
Once downloaded, it becomes available in the package manager. You must first download it (via the button at the bottom right of the window) and then import it (with the same button, still at the bottom right of the window).
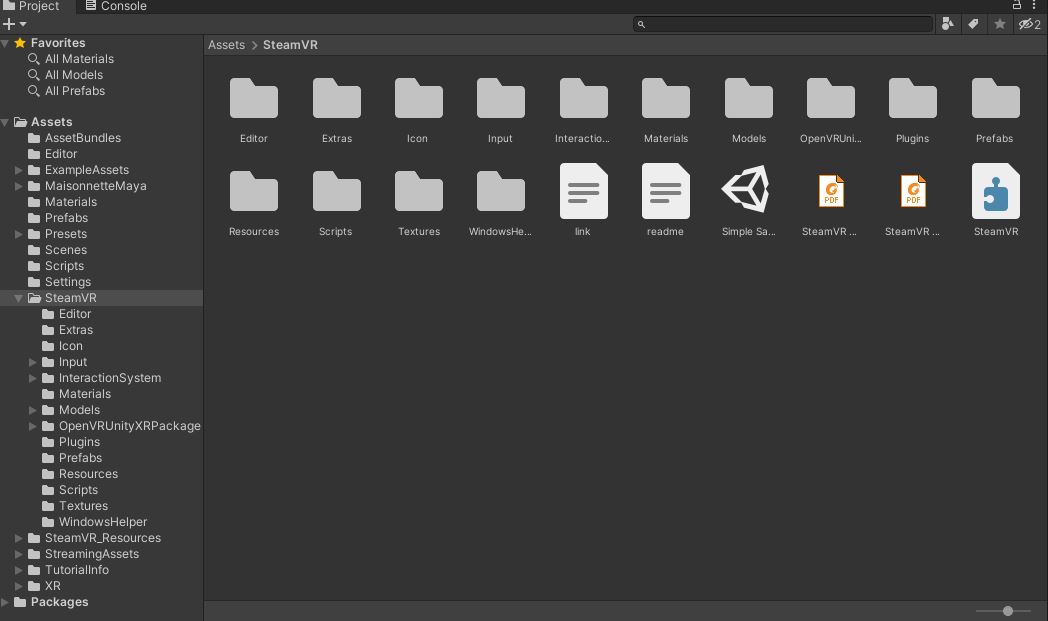
When the SteamVR plugin import is complete, the Unity project will have new project folders:
Do not omit variant shaders
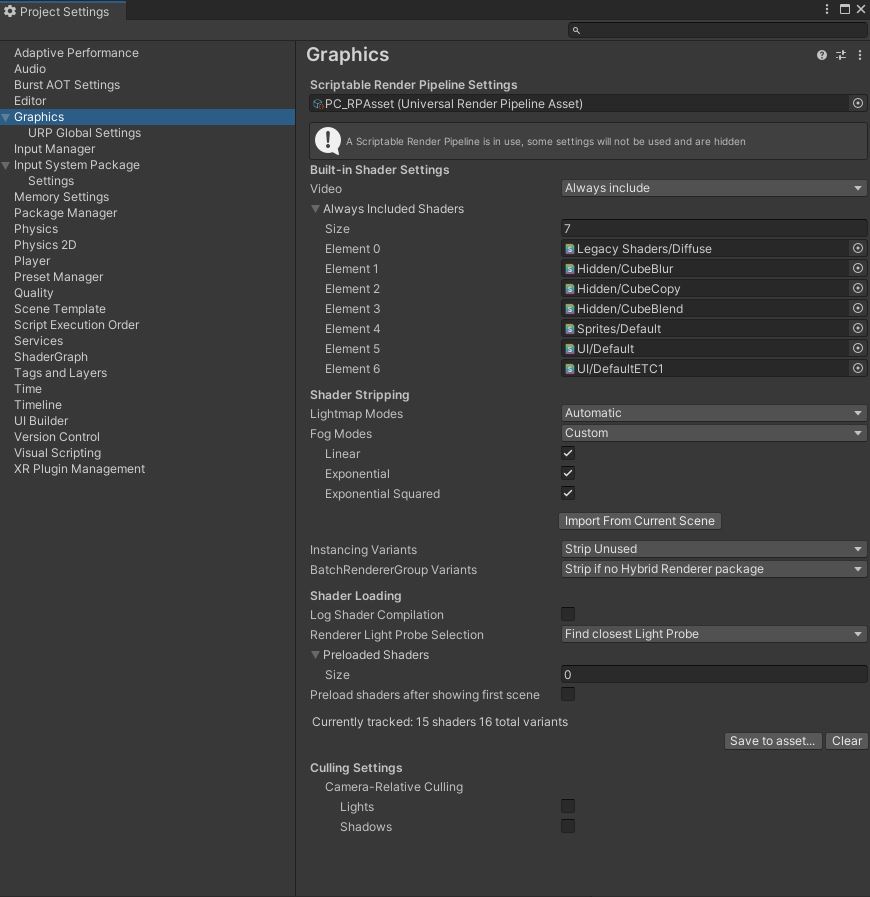
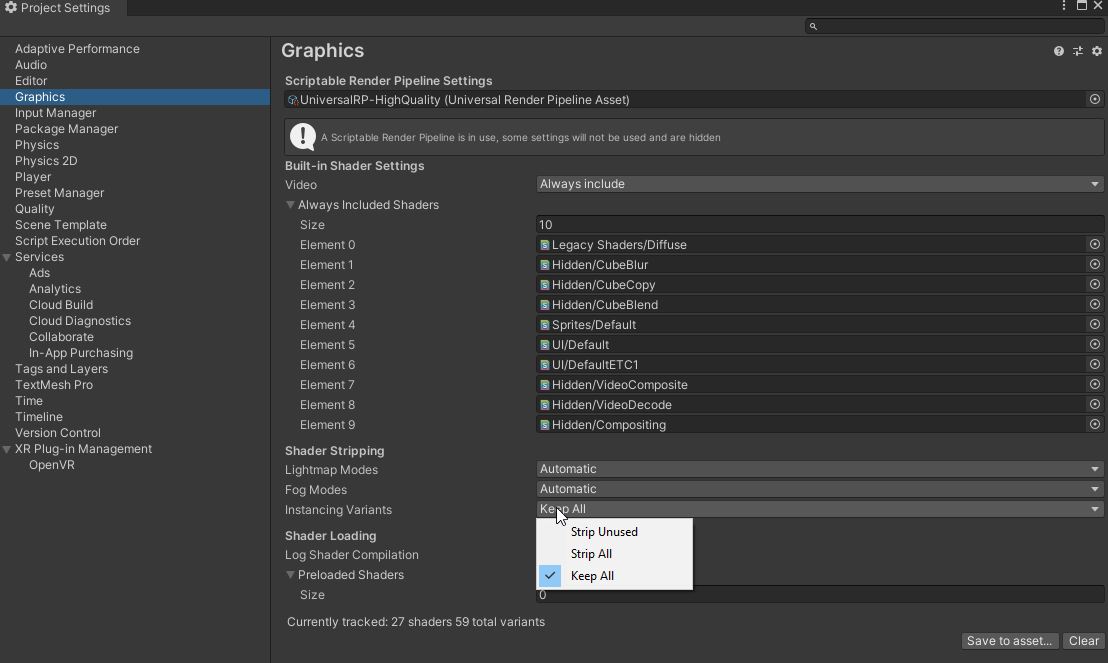
To complete the integration of the VR playback data with URP, it is necessary to tell Unity not to omit variant shaders. To do this, simply keep all variants by going to the project graphics settings (Edit/Project settings/Graphics).
Just indicate "Keep All" in the "Instancing Variant" parameter:
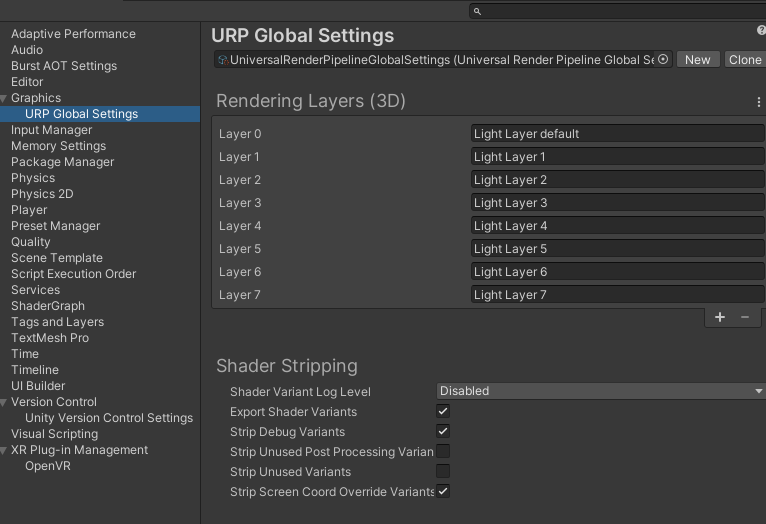
It may be necessary to enable an additional setting in the Unity editor in order to obtain a correct rendering in MindDev.
This concerns the URP shader configuration, where it is required to enable the export of shader variants.
URP + Assets Bundle + Fog !
URP renderer with fog
This consideration is only to be taken into account when using the URP renderer (default from MindDev 2023).
Fog in Asset bundle with URP!
There is a special consideration when using an Asset Bundle for VR with the URP renderer.
As with exporting an asset bundle for a VR experiment, fog support is not automatic when exporting specific shaders. In fact, special care must be taken to ensure that the use of fog in MindDev works with the exported asset bundle.
In the Unity project, all the shaders must be exported, taking into account all the fog modes. This is done in the ‘Graphics’ tab of the ‘Project Settings’ window in the fog modes. You need to switch the option to ‘Custom’ and activate the 3 modes. The resulting asset bundle file will be a little heavier, but it will be guaranteed to be compatible with MindDev and its fog mode.